Customize Your CV
Background
The beauty of having all of your activities and accomplishments centralized in Faculty Success is that you only have to record something once, in a single place, and the system can do the heavy lifting of bringing the right information together in the right format for you. So when people come asking for information on your activities, accomplishments and qualifications, the way we know they do as many as eight to twelve times a year, you can produce up-to-date responses with just a few clicks.
You likely have experience running reports using templates that your college or university has configured for general use across a college or university. These are great for when the institution defines the requirements for how the content is structured and what gets included. But equally, if not more often, you face requests for information on your CV that come from parties external to the university, and you need to create CVs or activity summaries for presentation proposals, grant, award, or sabbatical applications, your personal online profile, and more. In these cases there are often nuanced requirements for how you present your experience, or the documents need your personal touch. Customizing a CV in response to one of these requests can take as much as an hour and a half in a word processor; in Faculty Success it takes ten minutes.
With a few minutes of up-front configuration, you can build tailored templates for the most common requests you get and use them any time you need to produce up-to-date documents that present your work in your preferred format.
Creating Your CV
In configuring your custom CV you’re building a report template that will remember your settings and automatically pull in updated records from Faculty Success each time you open or download a copy of it.
You will have the option to start with a sample CV and make your own modifications as needed, or you may create your own template from scratch. The following instructions will walk you through the tools at your disposal as you configure your CV.
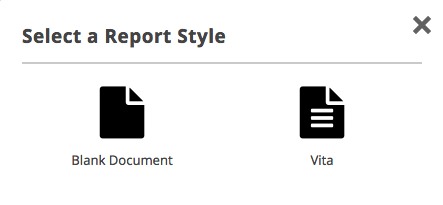
To create your personal CV, navigate to the Reports utility in Faculty Success and select  in the top-right corner of the screen. From here, you have two options:
-
Vita: Make this selection to start from the sample CV. This is a general, all-purpose CV format, and it may look different from the standard Vita template provided by your university.
This option will prove the easiest and fastest way to customize a CV. You can use the standard structure and make minor changes (such as filtering, drag-and-drop to reorder sections, and setting date ranges) to accommodate your needs.
-
Blank Document: This allows you to build a CV from scratch. With this option, your personal details will be added to the report for you, along with a sample section to use as a starting point to craft the rest of your report.
This option will allow for the most creativity on your part, since you can craft the entire report from the ground up. This may also be useful for ad hoc requests for specific activity data. For instance, you could select this option to quickly generate a list of formatted citations for your recent Publication and Presentation activities.
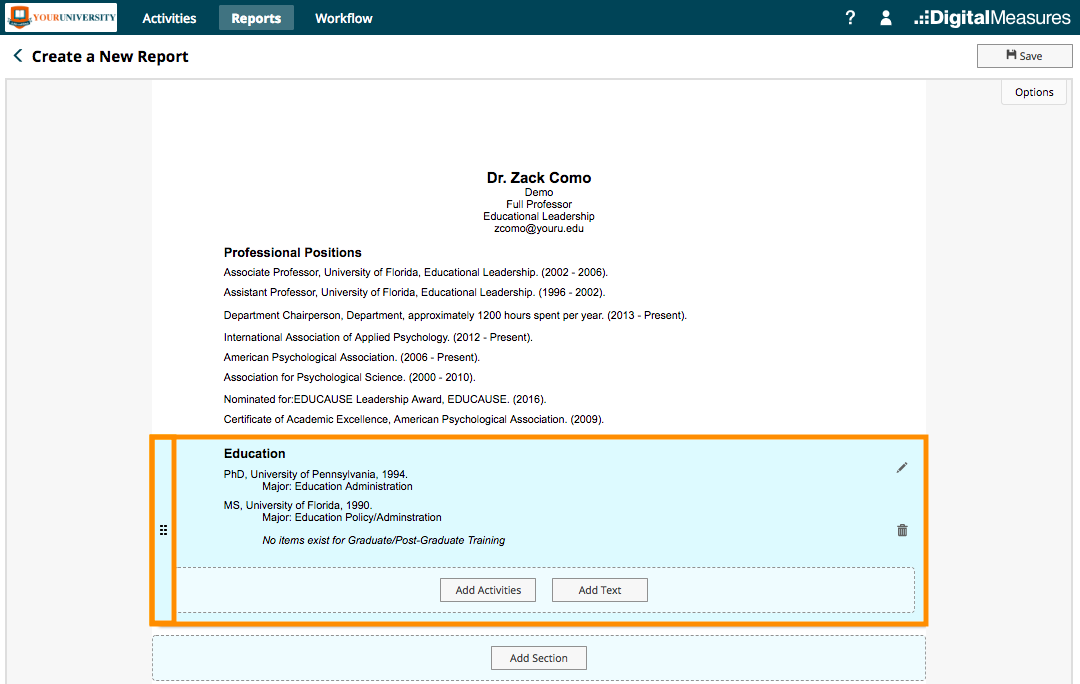
THE “SECTIONS” STRUCTURE
Custom CVs are comprised of sections, which are essentially containers to use to group elements of your document together. When you click onto an element of your CV the system will highlight the section it’s in.
There are top-level sections, and then within those you can add one or more Activities or Text sections. The majority of the sections in a CV will be Activities Sections, which contain citations of your data that you’ve entered through the Activities utility.
Previewing Your CV
The customizable CVs feature provides a live preview of how your data will pull into your CV template so you can see the impacts of your changes as you go.
REORDERING SECTIONS
To reorder sections, highlight the section you want to move. On the left side of the section, find the drag-and-drop handle  . Select and hold this handle, and drag the section to the appropriate location.
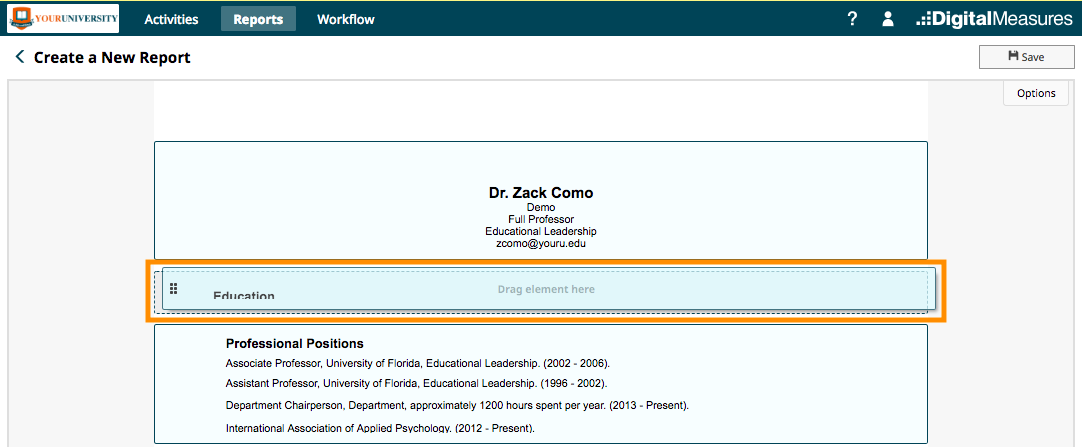
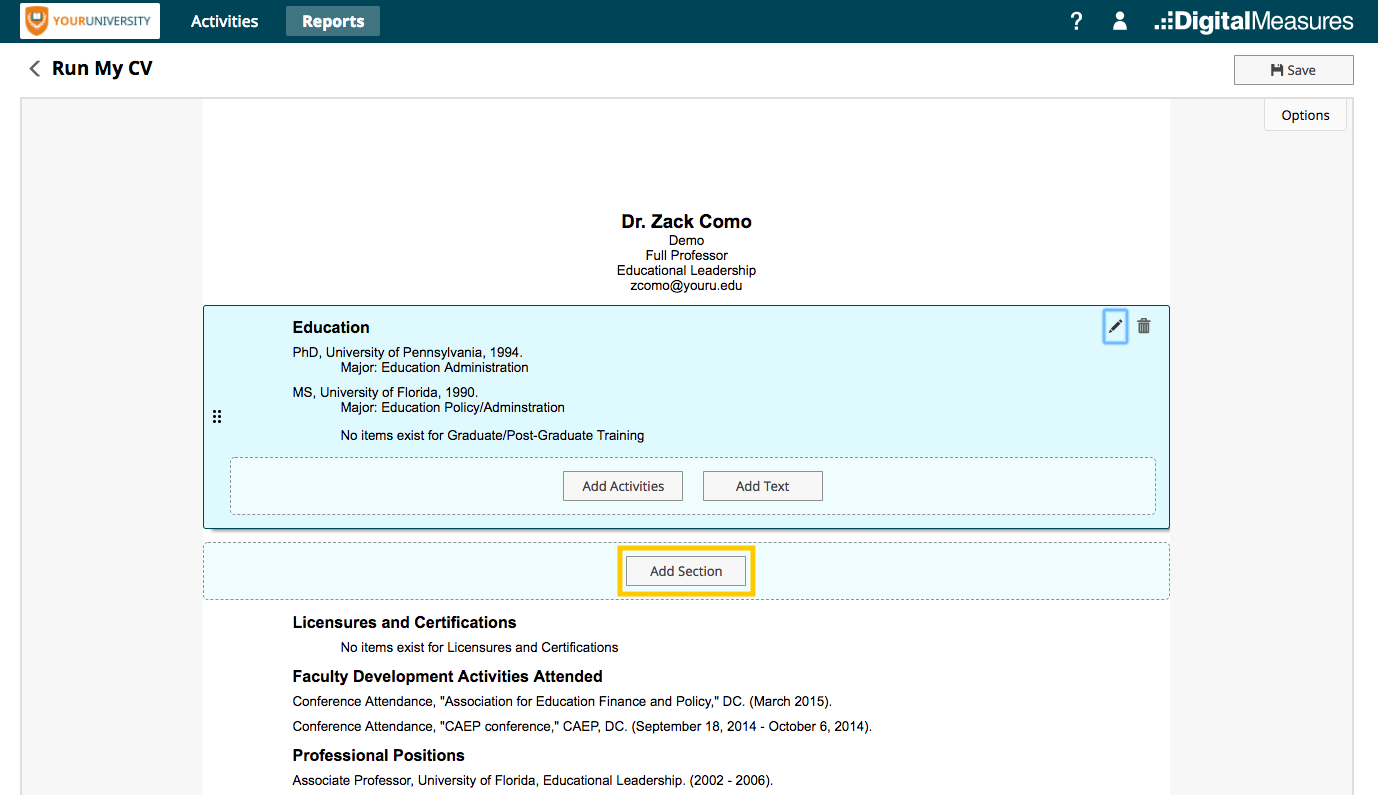
Adding an Activities Section
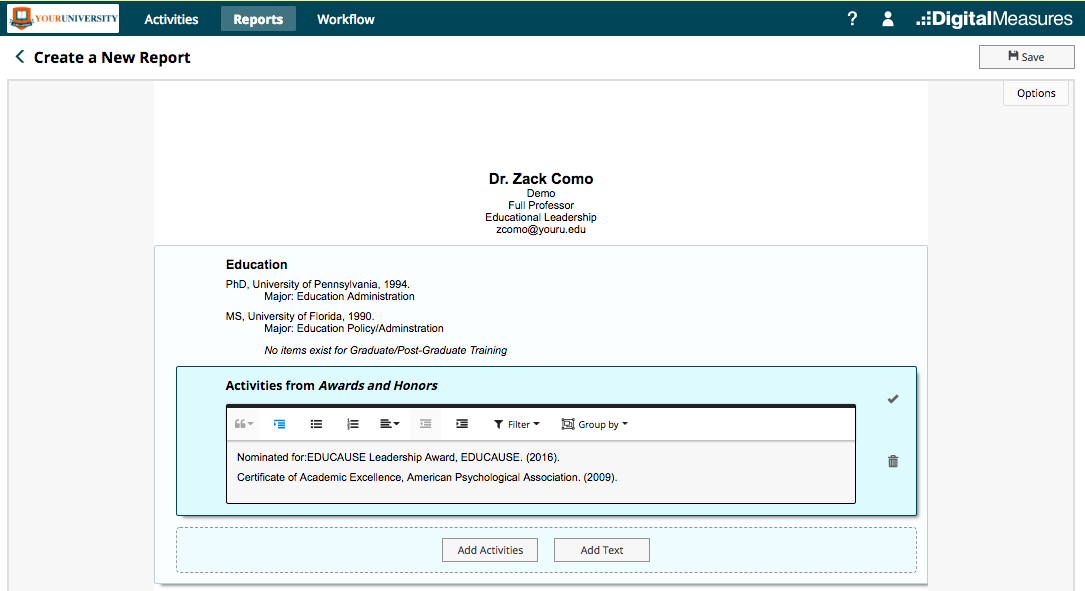
To pull in citations from a data collection screen you will add an Activities Section to your CV. Just select an existing element in the template, and select the “Add Section” button. Give the new section an appropriate heading, and select “Add Activities.”
At this point, you will need to select a Type of activity. The options available for “Type” will reflect the categories available to you in Activities. Let’s choose “Awards and Honors” and select the  icon to confirm your selection. You will notice your Awards and Honors records stored in Faculty Success now appear in the designated section. You will also see a selection of formatting, filtering and grouping options you can apply to this new Activities Section.
If your data is not up-to-date in Activities, some of your accomplishments may be missing from an Activities Section. Suppose you received an award last week, but you didn’t remember to enter it in Activities. Take a moment to save your report template, navigate to Activities, add the new record, and return to your report. If the new record meets your filtering criteria, it will now appear in your customized CV.
FORMATTING AN ACTIVITIES SECTION
To add formatting to an Activities Section, click on the block of citations you’d like to format. You will then see a toolbar with formatting options provided, including:
- Hanging indentation
- Bulleted lists
- Numbered lists
- Alignment
- Indent and Outdent

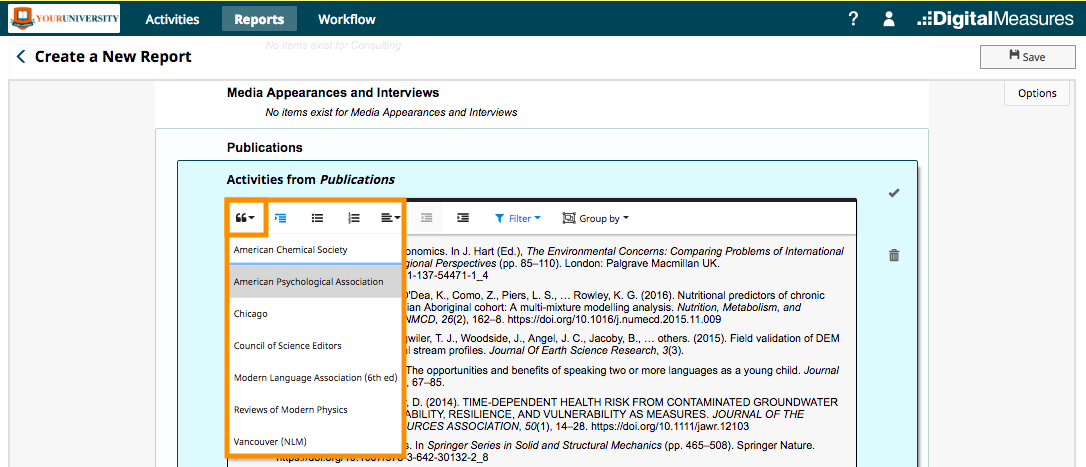
For Activities Sections with data from the Publications (or Intellectual Contributions) screen, you may also change the citation style that dictates the formatting for those entries. To set the citation style for publications select the ![]() in the activity options toolbar and select your preferred style.
in the activity options toolbar and select your preferred style.
To apply your preferred formatting, make your selections and select the icon.
Filtering Activities
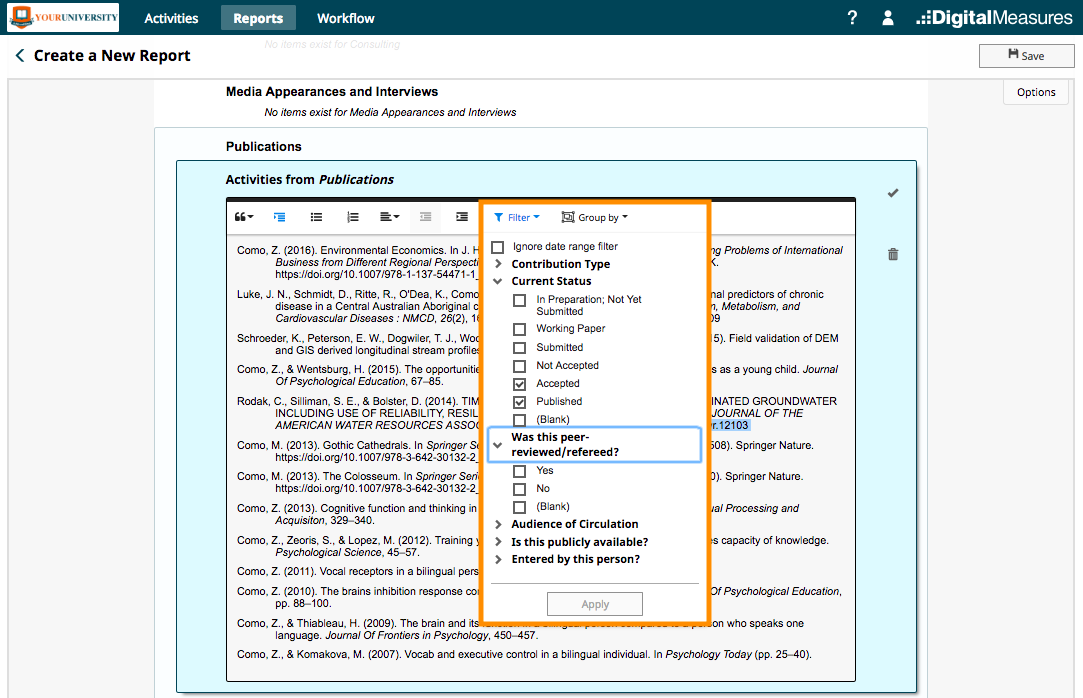
You may need to filter the content of some of your Activities Sections:
- To ensure that only citations meeting specific criteria show (e.g., only “accepted” and “published” publications or only “peer-reviewed/refereed” items)
- To override the global CV date range for a specific section, like your degrees
To apply filters to an Activities Section, click on the section of citations you wish to filter. This will reveal a toolbar with a “Filter” option. Expand this “Filter” menu and select your filters. Then select the icon to apply them.
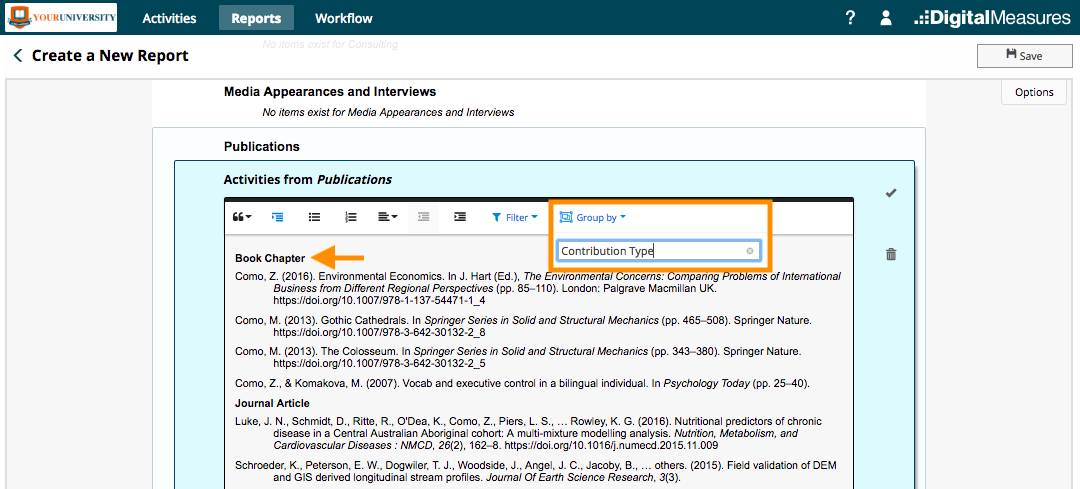
GROUPING ACTIVITIES
You may also want to change how activities are grouped within a section. To dictate how records should be grouped, select an Activities Section and select a field under “Group By”. This list is based on the drop-down list fields available for a given screen.
Adding a Text Section
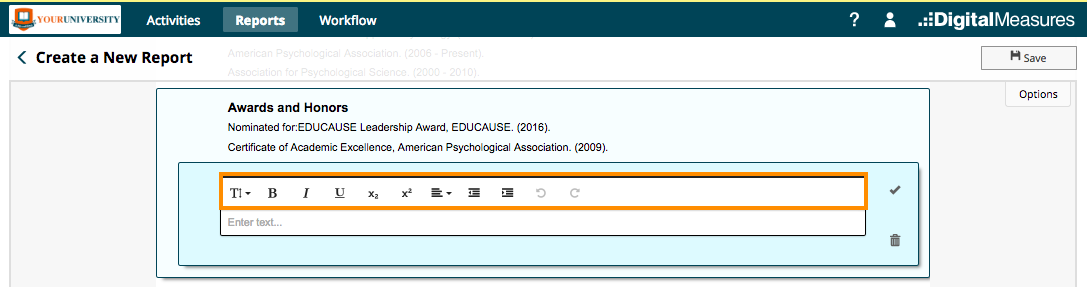
You may also add Text Sections to your report when you need to include subheadings, annotations, or a summary of your activities. To do this, highlight an existing section and select “Add Text.”
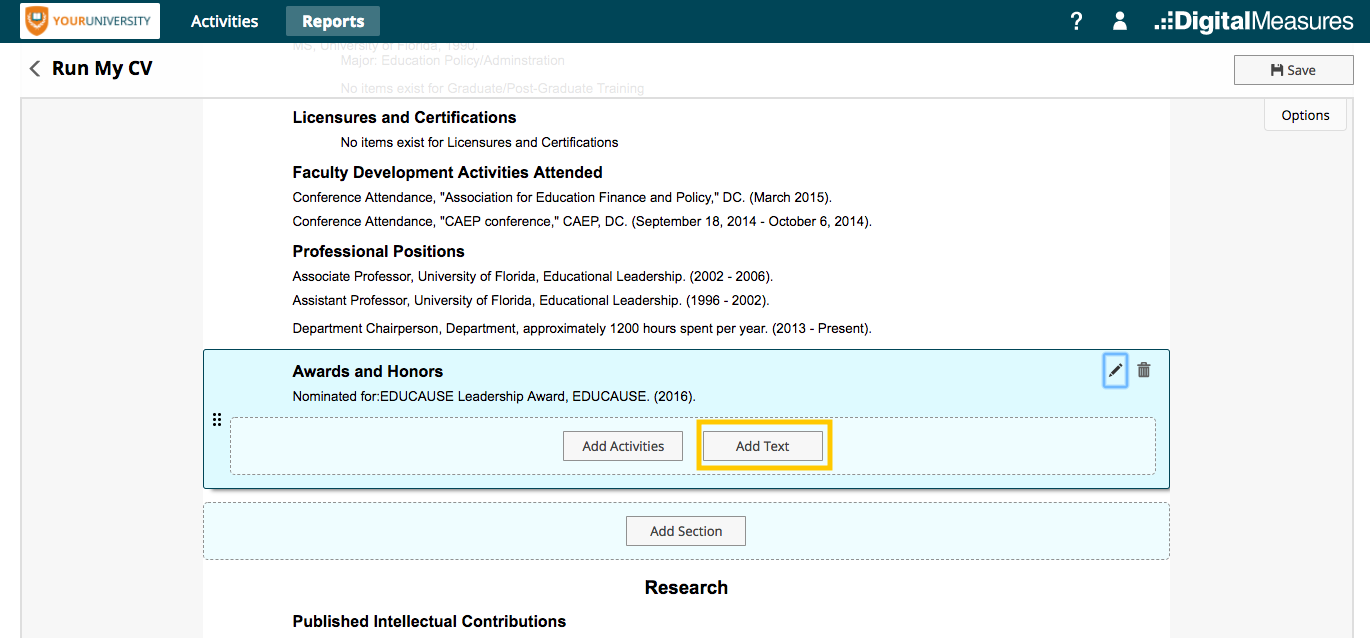
A free-text box will appear for you to add any appropriate notes. You also have a few rich text formatting options like bold, underline, and italicize.
Keep in mind that Text Sections should not be used to enter activity records that do not appear in an Activities Section. If you enter an activity record as text within your customized CV, that record will not be available for all of your reports. Take a moment to add or update this record in Activities so it will always be available in other reports and CV templates.
Adjusting the Report Date Range
You also have the ability to adjust the date range for your CV template. For instance, you can create one CV template to reflect the last year’s worth of activities, and you can have a second template to reflect three years’ worth of activities.
In the top-right corner of your report preview, you will see an “Options” tab. Select this tab, and you will be presented with some additional buttons. Select “Date Range”. On the Date Range pane, you have the following options:
- All Dates (default): This selection will include all of your activities from Activities.
- Start Date and End Date: This option allows you to define a specific date range for the report.
- Undated records: Choose whether to include activities that do not have a date entered.

NOTE: You also have the option to override the report-level date setting on a section-by-section basis. Suppose you want most of your sections to be limited to a year’s worth of activities, but you want to include all of your “Degrees” or “Education” records. In this case, you would set the Start Date and End Date appropriately within the Options tab. Then you would, adjust the filters on the Activities Section with the citations for your degrees. See Filtering Activities for more details on how to do this.
SETTING FONTS AND HEADER FORMATTING
Similar to how you can set global document styles in a word processor, you can set fonts and header formats at the document level. You can access these options via the "Format Text" button in the Options pane.
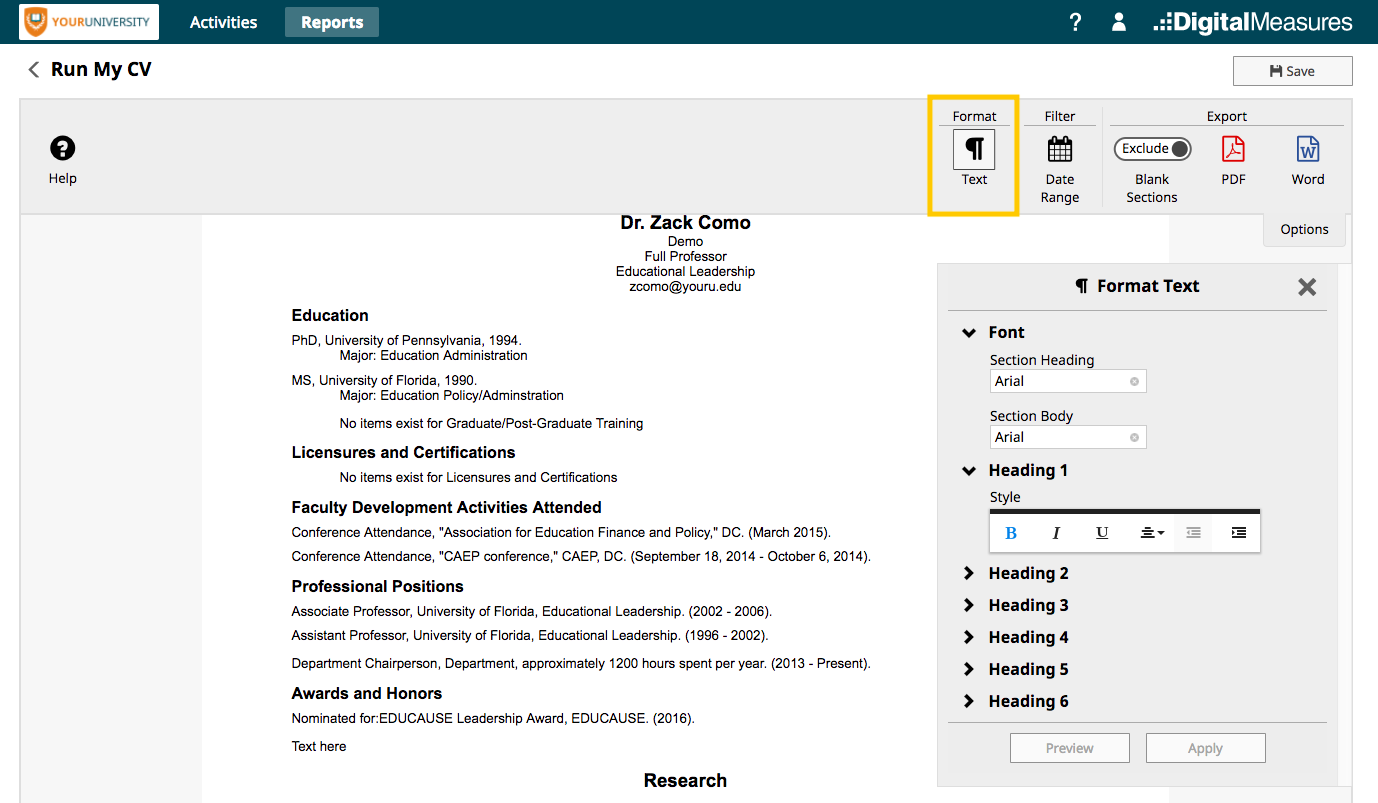
Here, you can specify the fonts for the body text, as well as the headings. Below the font selections, you can also adjust some style options like bolding, alignment, and indentation for each of the heading levels available.
Saving Your Report
Keep in mind that once you’ve built a report template, you can use that template infinitely. In order to do that, you need to save the report. To save, simply select the “Save” button in the top-right corner of the screen. You will be prompted to name the report before saving. Make sure you give the template a unique name, since it will appear among your list of available reports in the Reports utility.
Each time you open the report, it will remember the ordering, filtering, and settings from the last time you saved the template, but it will refresh with any new records or updates that have been entered in Activities.
Exporting Your Report
When a request for your information comes in, you can use your custom CV(s) to produce the document to provide in response. Just select your preferred CV template in the Reports menu. When it opens you’ll see it automatically pulls in all of the relevant information in the format you configured. Then you can export a copy of this document to share with the requestor.
To export your custom CV, open the Options tab within the Report Builder. There are two Export options:
- PDF: This will download a non-editable version of your CV in PDF format.
- Word: This will download a copy of your CV in Microsoft Word format.

The “Blank sections” toggle controls whether sections with no data should appear in the exported copy of your CV. Confirm this setting before you choose your output format.
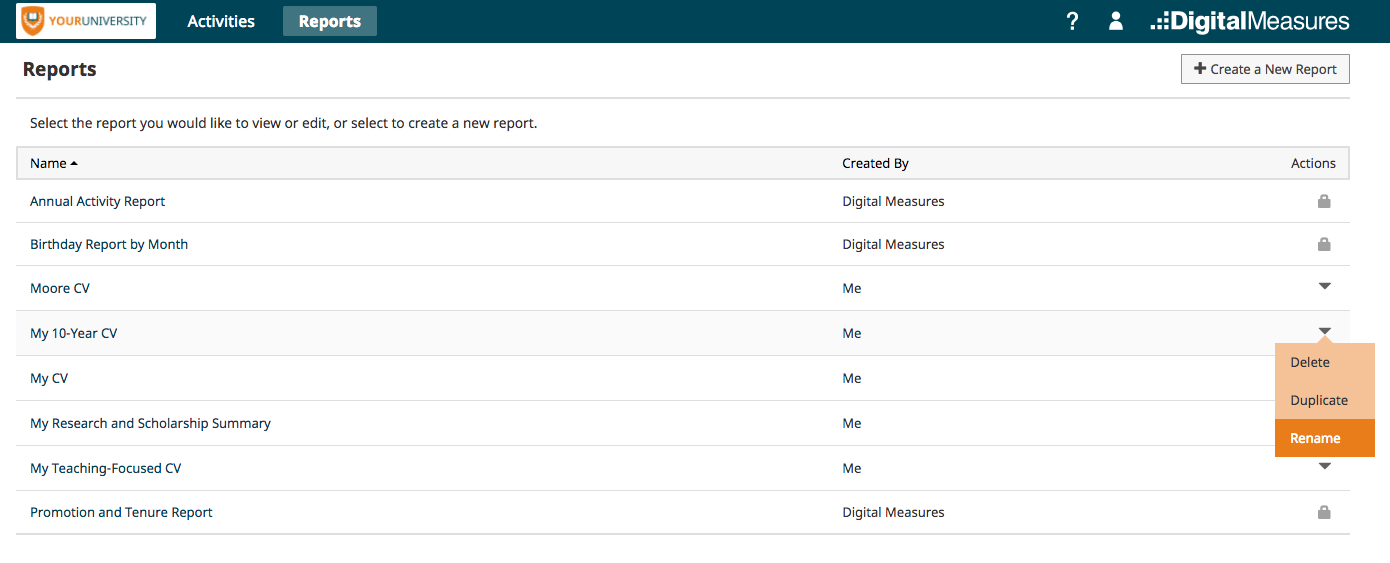
Duplicating Your Report Template
Once you have configured a CV, you may want to create a different version with minor adjustments. Instead of creating another report from scratch or from the sample template, you can make a copy of your customized CV and make any necessary adjustments to the resulting duplicate.
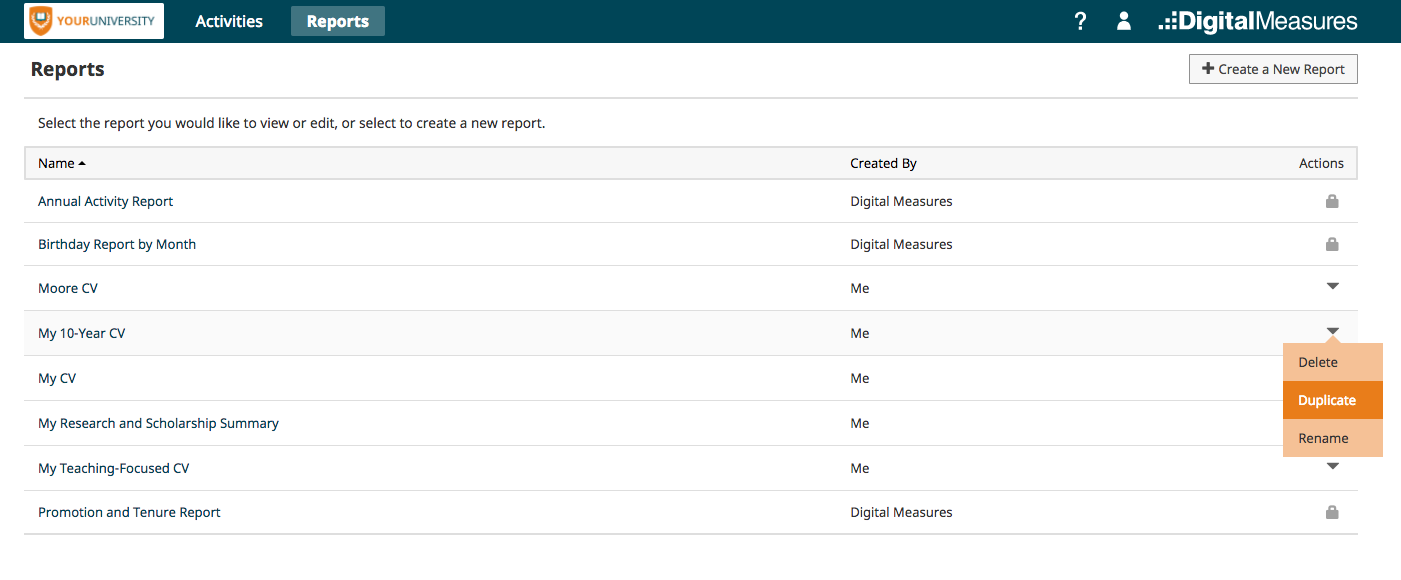
To duplicate a CV, navigate to the Reports menu. Locate the template that you want to copy. To the right of your saved template, you will find an arrow in the “Actions” column. Select the arrow, and select the Duplicate option from the dropdown list. At this point you will be prompted to name the duplicated report. Give this report a name that will help you easily identify it from your list of reports, and select “Duplicate”
Renaming Your Report Template
To rename a CV, navigate to the Reports menu. Locate a CV that you have created and saved. To the right of your report, you will find an arrow in the “Actions” column. Select the arrow, and select the Rename option from the dropdown list. Enter a new name for the report, and select “Rename”.